
A Beginner's Guide to Turning Old Photos Into Videos

Image Source: depositphotos.com
Somewhere on a hard drive or in a shoebox, there are photographs that matter to you — a grandparent on a doorstep, a holiday nobody documented properly, a childhood pet. They get scanned, admired for a moment, and filed away again. Motion changes how those images land, because movement restores something a still frame flattens: presence. This tutorial assumes no editing experience. You will learn what photo animation actually does, how to prepare an archive image, and how to finish a short, respectful memory clip in a single sitting.
What Photo Animation Really Is
Animating a photograph does not add a zoom effect. Modern systems interpret depth in the image, separate foreground from background, and generate plausible movement between them, along with subtle motion in elements that would naturally move — cloth, smoke, water, leaves. The result feels less like a slideshow and more like a moment briefly resuming.
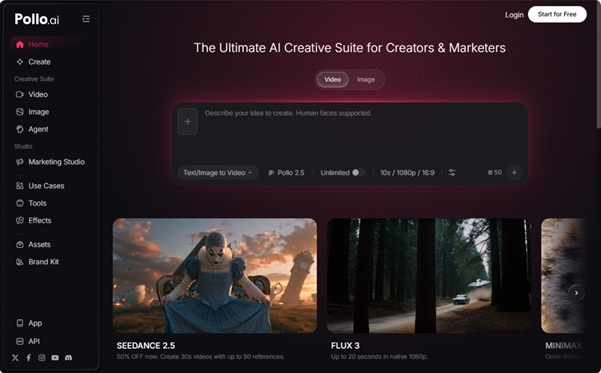
Tools have consolidated too, which helps beginners enormously. Rather than juggling one application for animation, another for audio, and a third for assembly, the turn photos to videos workspace within Pollo AI brings multiple leading models under one interface and outputs a high-definition clip with fitting cinematic music and ambient sound already in place. For someone learning, that matters more than raw capability, because feedback arrives in minutes and you build intuition quickly.
The wider effect has been a quiet democratisation. Family historians, community archivists, and hobbyist storytellers now produce work that would have required a post-production suite a few years ago. Restoration specialists and local museums have noticed it too, using motion to make archive material legible to audiences who scroll rather than browse.
Why This Skill Is Worth Learning
Short video is the default language of the open internet, and the supply of it is effectively unlimited. What stays scarce is meaning. A well-chosen family photograph with three seconds of gentle motion and the right piece of music outperforms a technically superior clip about nothing. Learning this now gives you a growing personal archive rather than a folder of experiments.
What You Need Before Starting:Very little. A browser, one photograph at the highest resolution you can find, thirty uninterrupted minutes, and a rough idea of the feeling you want. If you are working from prints, scan at a generous resolution rather than photographing the print with a phone at an angle — geometry problems are the most common cause of strange results. Create two folders from the outset, one for raw generations and one for approved clips. That discipline will matter around your fiftieth file.
A Staged Learning Path
Stage 1: Prepare the source image
Straighten, crop lightly, and repair obvious damage before animating. Avoid heavy filtering; strong grain and aggressive contrast confuse depth interpretation. If a photograph is severely faded, a gentle restoration pass first will improve motion quality noticeably.
Stage 2: Generate your first clip
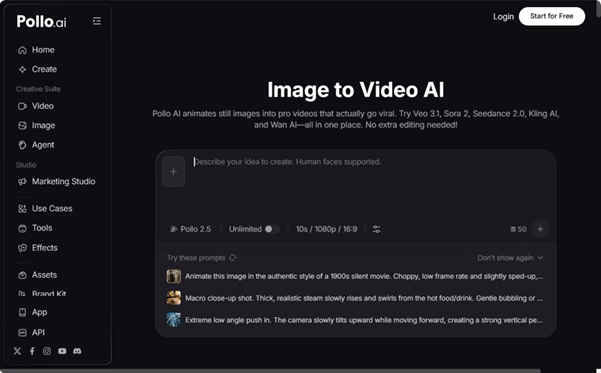
Upload the image inside turn photos to videos in Pollo AI and describe the movement in one short sentence — a slow drift toward the subject, a faint breeze in the trees, light shifting across a doorway. Generate three versions and compare them for stability rather than beauty. Beginners almost always ask for too much; restraint is the entire skill here. Faces in particular reward subtlety, since exaggerated motion crosses quickly into the uncanny.
Stage 3: Choose sound with intent
Music decides the emotional register more than any visual choice. Test a clip against two contrasting pieces and you will feel the difference immediately. Restraint applies again: sparse piano or gentle ambience usually serves memory footage better than a swelling orchestral score.
Stage 4: Build a sequence rather than a single clip

Once individual shots work, the natural next step is joining several into a short story. This is where insMind, part of the same Pollo AI ecosystem, becomes useful for beginners. Its custom first-and-last-frame control lets one clip flow into the next with smooth transitions instead of hard cuts, which is what makes a group of animated photographs feel like a film rather than a playlist. Generation also runs around ten times faster than older tools, so assembling a six-shot sequence stays a single-evening project.
Stage 5: Explore style, carefully
For lighter material — travel photos, illustrations, celebrations — the two hundred-plus presets and art-style filters in insMind open creative options, including looks inspired by Ghibli and Pixar animation. These suit birthdays, invitations, and social posts far better than solemn archive work, where a plain treatment usually shows more respect. Its single-instruction AI agent is handy when you simply want a finished result without adjusting settings.
Your First Real Project
Choose one photograph with a person and a place in it. Prepare it, animate it with a single slow camera movement, add forty seconds of quiet music, and add one line of text stating who and when. That is a complete piece. Show it to someone in the photograph or someone who knew them; their reaction will teach you more about pacing and restraint than any tutorial.
Once your loop is reliable, deepen in one direction rather than three. Some learners study camera language and lighting; others move toward narration, interviews, and longer sequences; a few turn the skill outward, producing memorial films, anniversary pieces, or local history projects for others.
Common Mistakes to Avoid
Over-prompting is the first — long descriptions crowded with adjectives produce muddled motion. Ignoring audio is the second, since sound carries most of the emotional weight. The third is chasing a perfect take through endless regeneration instead of accepting a good one and moving on.
A subtler mistake is treating archive material like content. Family images belong to people, some of whom are living. Ask before publishing, keep alterations honest, and avoid inventing events that never happened. The technology can generate almost anything; discretion is what makes the result trustworthy. When you do move into promotional or celebratory work, the preset library in insMind is the appropriate place for stylistic experimentation.
Conclusion
You do not need equipment, software knowledge, or a background in editing — only one photograph you care about and the patience to keep the motion gentle. Prepare it properly, generate a few versions, choose sound thoughtfully, and share it with one person. Repeat that five times over the next month. The technical ceiling will keep rising without you, but the judgement you develop in those five attempts is entirely your own.