Systems | Development | Analytics | API | Testing
January 2021
Comparing k6 and JMeter for load testing
When I joined the k6 team in late November, the foremost question on my mind was "How does this compare to JMeter?" You see, I come from a performance testing consulting background, and in the last few years, JMeter has been far and away my tool of choice. So what am I doing on the k6 site, talking about how much I love JMeter? Well, firstly, it turns out that the k6 team is pretty open and transparent, especially about potential improvements in k6.
Automate Load Testing with Jenkins CI/CD Plugin
Automate Load Testing with Jenkins CI/CD Plugin From LoadFocus https://loadfocus.com/.
Install the Jenkins Load Testing plugin from https://plugins.jenkins.io/loadfocus-loadtest/
Load Testing: https://loadfocus.com/load-testing
Continuous Performance Testing in CI/CD with Jenkins Plugin
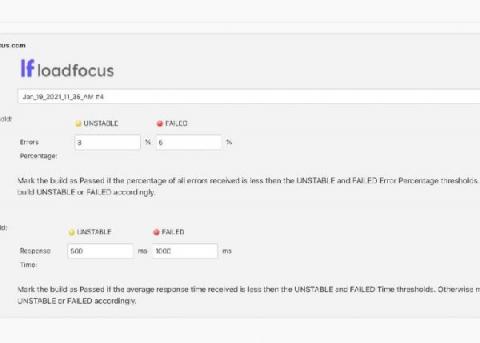
We’ve released a new version of our load testing plugin for Jenkins CI. Load Testing CI/CD Plugin helps to run load tests automatically as a Post-build action and mark the build as PASSED, UNSTABLE or FAILED based on errors received during the test run and the average response time. Use the Post build actions and define your load test limits in order to mark the build UNSTABLE or FAILED.
How To Create An Automated Login Page Test And Use Multiple Credentials
Countless things should be tested within web applications but among them, one of the most important scenarios to be tested and even load tested is the user login process. User login serves as a medium between providing users with most of the product features and therefore requires careful and thorough testing. If your website allows users to log in, a login page test is necessary. An automated test for this can be easily created for this.
Best Website Performance Testing Tools
What is the usual criteria in choosing an online store? It should have reasonable prices, sell quality products, and most of all, it should have a fast loading time. A website’s performance is essential. A two-second delay can make a big difference to your website and revenue as well. In fact, Neil Patel reported that a mere second delay may cost an e-commerce site up to $2.5 million in sales annually.
k6 v0.30.0 released
k6 v0.30.0 is here! 🎉 It was a bit of a slow after-holiday release, but it still packs a few major new features and improvements that users have been requesting for a long time. For additional details, see the full release notes on GitHub.
Top 5 Reasons for Using Apache JMeter
If you haven’t heard of Apache JMeter, then here is a short intro on what is it and how it works. We’ll keep this article short and jump straight to the list of top reasons to use Apache JMeter: Apache JMeter has a GUI for designing test scenarios, however the command-line is used for actually running the tests (run your JMeter tests in the cloud with JMeter Load Testing tool from LoadFocus).
The basics of Simple Performance Testing
You don’t have to performance test if you are not bothered about the performance of your application; this is the only reason, if you are bothered and you want to make sure your customers get the best possible experience then it is wise to do some.
Looking at the uses of JMeter Timers
Timers in JMeter are incredibly important when it comes to the balance and pace of your performance tests, we are going to look at the Timers that ship with the standard JMeter installation in this Blog post but there are others that are available as a Plugin and hopefully this post will encourage you to investigate these further.
Best Performance Testing Tools
Implementing the best performance testing tools allows for an optimized end user experience and improved web performance. In order to execute accurate and effective performance testing, it is important for QA engineers to have access to the right set of tools. With the plethora of performance testing tools, it has become tedious to pick the right tool for your use case. Let’s explore our list of the best performance testing tools.
What is a Good Example of Load Testing?
Whenever I get asked why do I need load testing or why is load testing so important, over and over again I come up with this simple example. Let’s say that you send an email campaign to 10,000 subscribers of your website/blog. What will happen to your website if 1000 subscribers open the email they’ve just received and the email is super interesting and they decide to click the action button in the email, link which will take them back to your website.
How to Improve your WordPress Performance Score
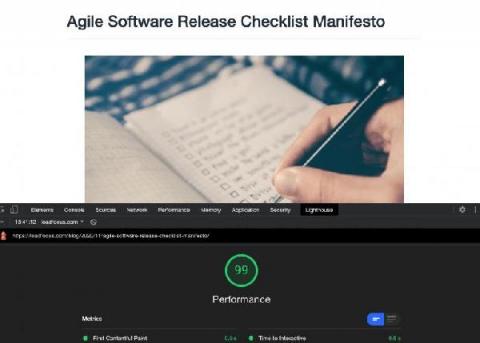
We managed to get a 99/100 Performance Score with Google Lighthouse, check the details below how we did it. Read more on how to run a Google Lighthouse audit. First of all, you’ll need to install a list of WordPress plugins, activate and configure them. This will manage your JS, CSS assets and minify the HTML for all pages. JavaScript Options We’ve only ticked the two options here: CSS Options HTML Options Misc Options 2.


